
Send emails with custom templates using SendGrid
Integrating Send Grid in your Dotnet Core App

A full-stack web developer passionate about software development, science and technology.
Sending an email is an important feature that's required for any production-level application.
While there are other ways like creating a SMTP(Simple Mail Transfer Protocol) Server (for sending, receiving emails) and Razor Pages (for designing custom templates), I found using SendGrid to be hassle-free.
Why I chose SendGrid over conventional Razor Pages?
As our app was getting bigger, we felt a need to offload our email code to Azure Functions (Serverless🔥). So as Razor Pages are stored on our server, they don't work on Azure Functions. There were a couple of solutions to this problem, either we make our HTML templates using StringBuilder or find a third-party service. I chose SendGrid as it does all the heavy lifting for us from managing our emails to designing custom templates.
Prerequisites
- Dotnet Core Application (can be any other app as well)
- VS Code (Or any other IDE, that's my favorite 😉)
- A free Sendgrid Account
Creating SendGrid API Key
After you have verified your email on SendGrid
- Find API Keys under Settings section
- Click on Create API Key
- Add API Key name and select access (I selected Full Access in my case)
- After your API Key is generated, save it safely somewhere (would be required as configuration in appsettings.json)
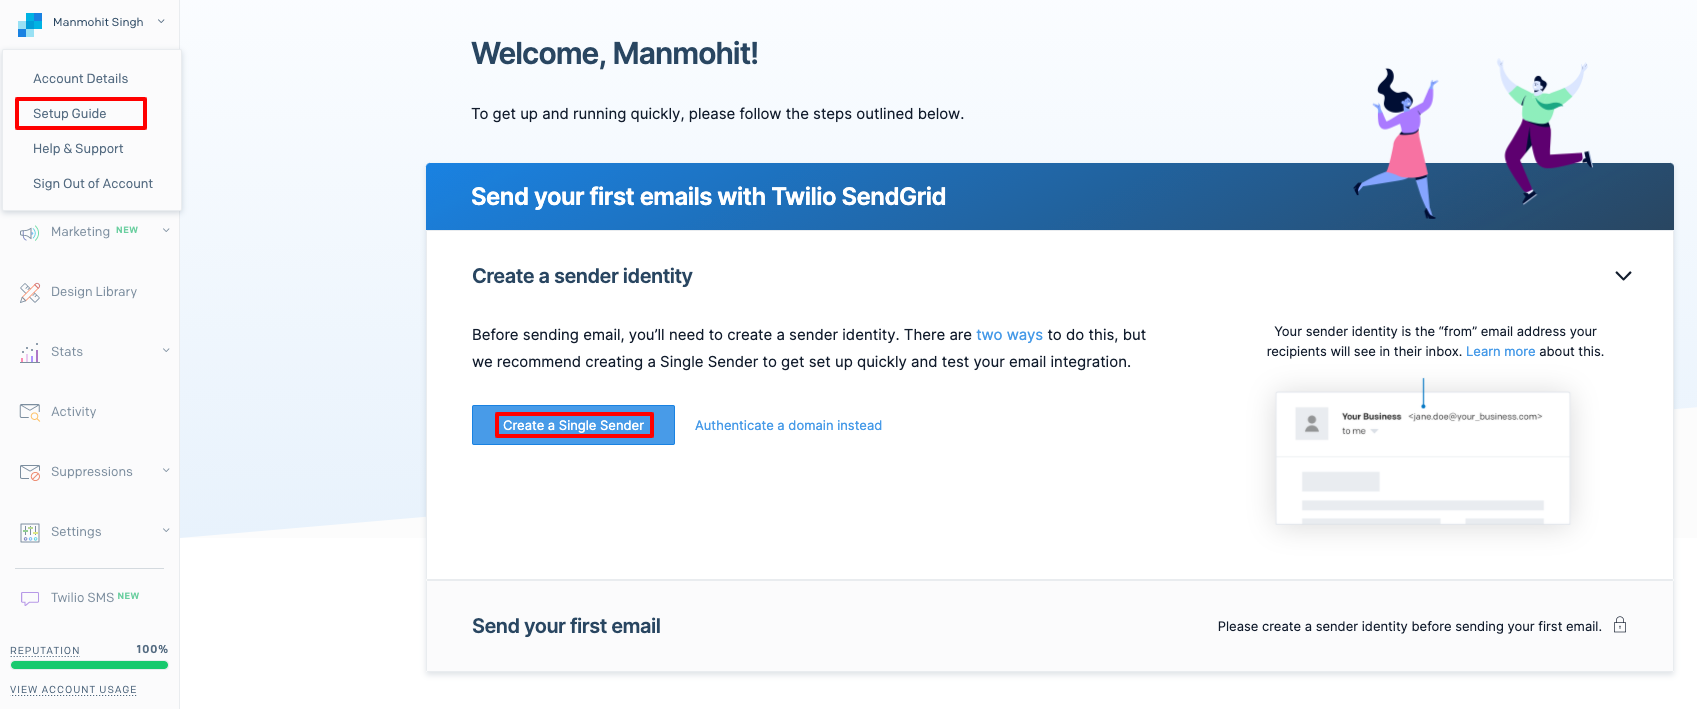
Creating a sender identity
Create a single sender identity to complete the setup.
Integrating using SendGrid Web API
- Now select integrating using Web API
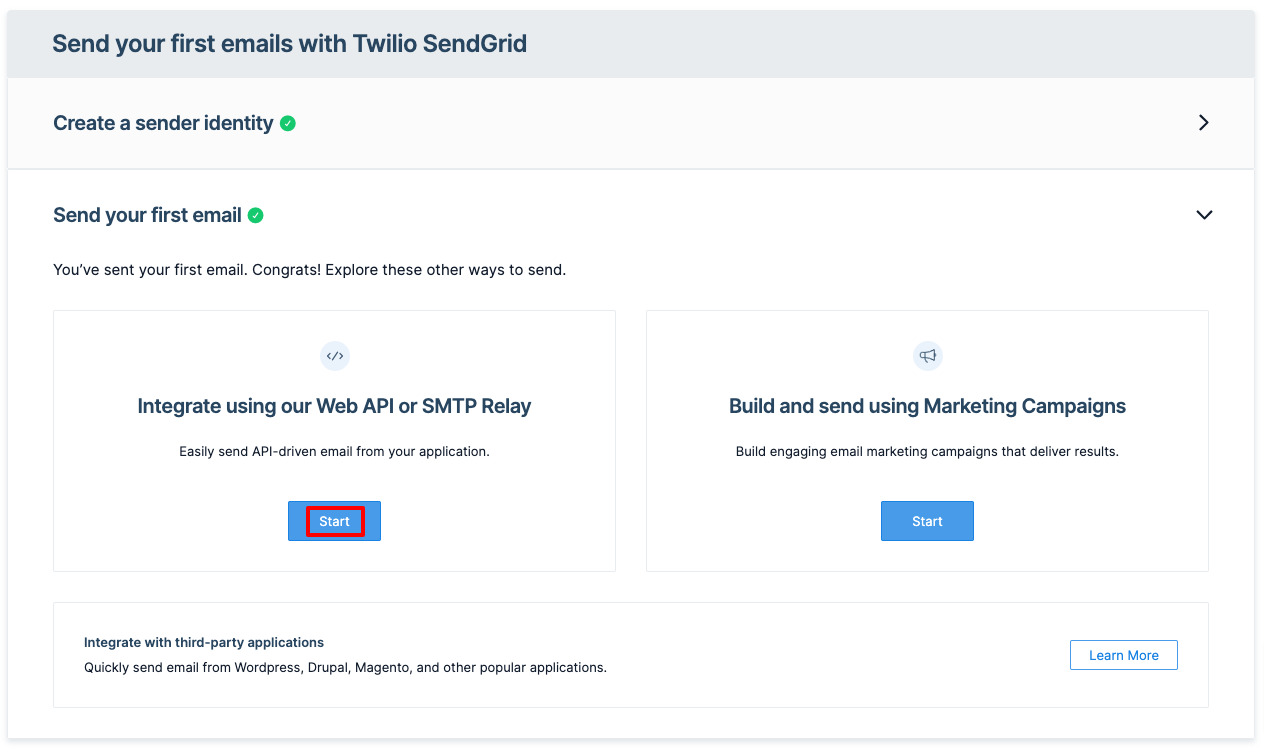
- Select your preferred language (I choose C#)
- Now you will be redirected to a code snippet of how to integrate it in your app. I am sharing how I did it.
In your appsetings.json add SendGrid Email Config as:
"SendGridEmailConfig": {
    "ApiKey": "your-unique-api-key",
    "FromMailAddress": "your-email-address",
    "FromMailName": "your-sender-name"
}
Now bind that configuration to your IServiceCollection in the Startup.cs
services.Configure<SendGridEmailConfig>(config =>
 Configuration.GetSection(nameof(SendGridEmailConfig)).Bind(config));
Now create EmailService.cs and add following code:
public class EmailService
{
    private readonly SendGridEmailConfig sendGridEmailConfig;
    public SendGridEmailService(IOptions<SendGridEmailConfig> sendGridEmailConfig)
    {
        this.sendGridEmailConfig = sendGridEmailConfig.Value;
    }

    public async Task<bool> SendEmailAsync(EmailContent emailContent)
    {
        var client = GetClient();
        var from = new EmailAddress(sendGridEmailConfig.FromMailAddress, sendGridEmailConfig.FromMailName);
        var subject = "Sending my first email using sendgrid";
        var to = new EmailAddress("recipent@example.com", "Recipient User");
        var templateId = "your-template-id";
        var templateData = "template-data";
        var message = MailHelper.CreateSingleTemplateEmail(from, to, templateId, templateData);
        var response = await client.SendEmailAsync(message);
    }

    private SendGridClient GetClient()
    {
        var apiKey = sendGridEmailConfig.ApiKey;
        var client = new SendGridClient(apiKey);
        return client;
    }
}
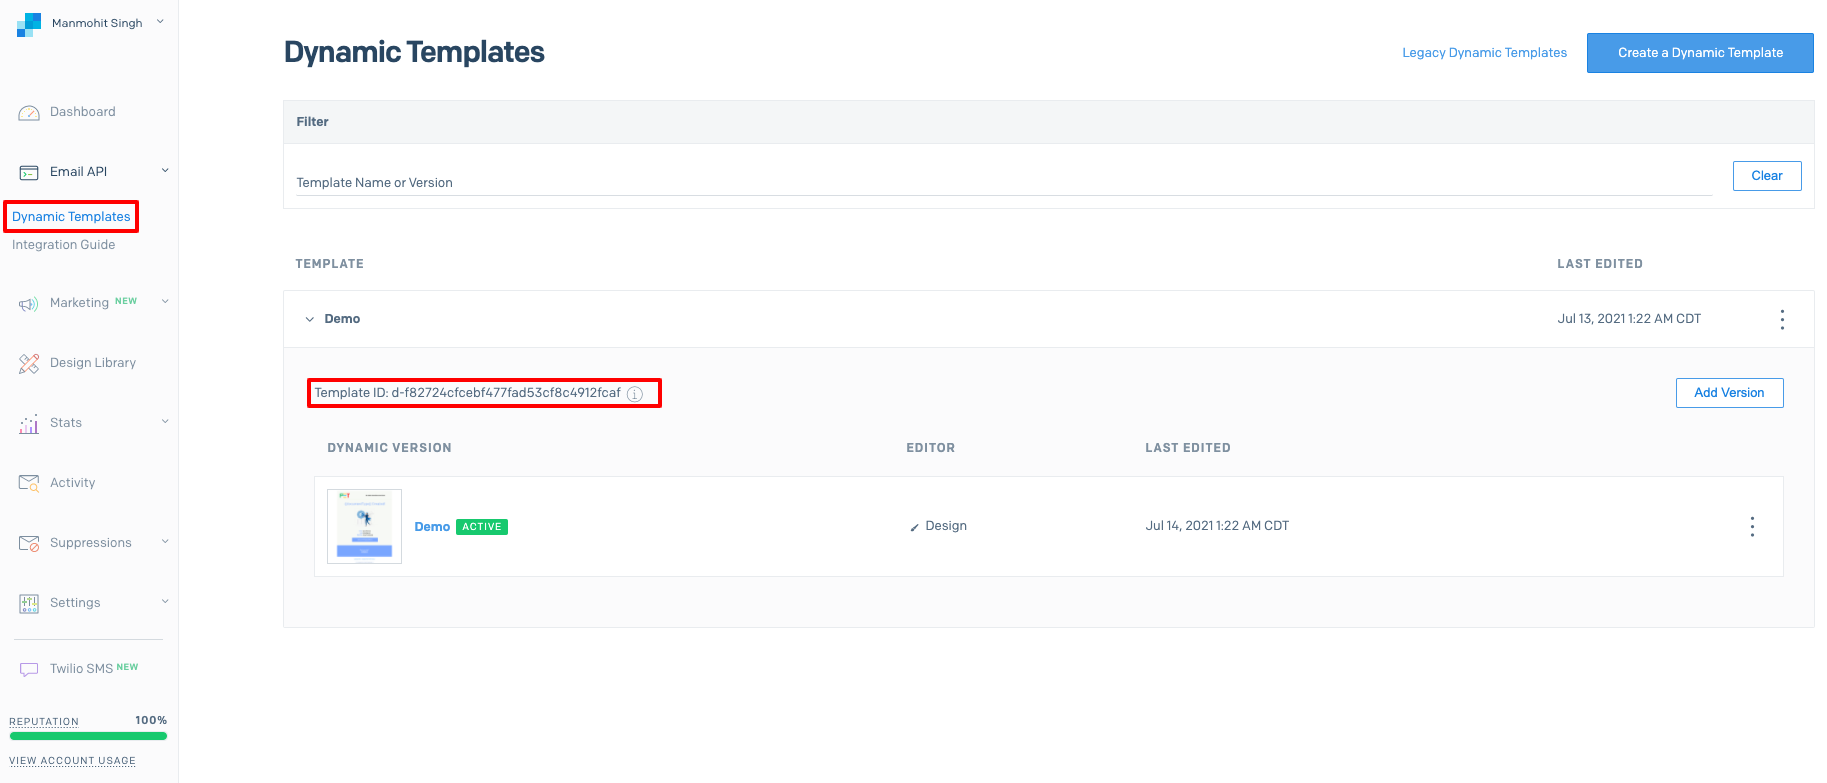
Creating your custom template
Now create your own dynamic template and add that template ID to your above code.
That's all for today folks. Happy Coding! 👨💻
 Also, buy me a coffee, book or a pizza by clicking the image above if you like what I am doing and want to support me. 😅


